
Looking to breathe new life into your home without breaking the bank? Furniture upcycling has become my financial lifesaver. When I moved into my first apartment last year, I had a strict $500 budget for furnishing the entire space. I created a stylish home while repurposing secondhand pieces, keeping my savings intact.

You can transform outdated furniture into custom showpieces with just a few basic tools, some creativity, and minimal investment. The beauty of upcycling lies in its accessibility—whether you’re hunting for free curbside finds, browsing thrift stores, or giving new purpose to family hand-me-downs. I’ve turned $20 dresser finds into statement pieces that friends mistake for high-end boutique purchases.
The upcycling journey isn’t just budget-friendly; it’s incredibly rewarding. There’s something special about creating unique pieces that reflect your style while keeping perfectly usable items out of landfills. With simple techniques like painting, reupholstering, or repurposing (like turning an old dresser into a bathroom vanity), you can achieve professional-looking results even as a beginner.
Understanding Upcycling

Upcycling gives old furniture new life through creative transformation. It’s a budget-friendly way to create custom pieces while reducing waste in our landfills.
The Basics of Upcycling
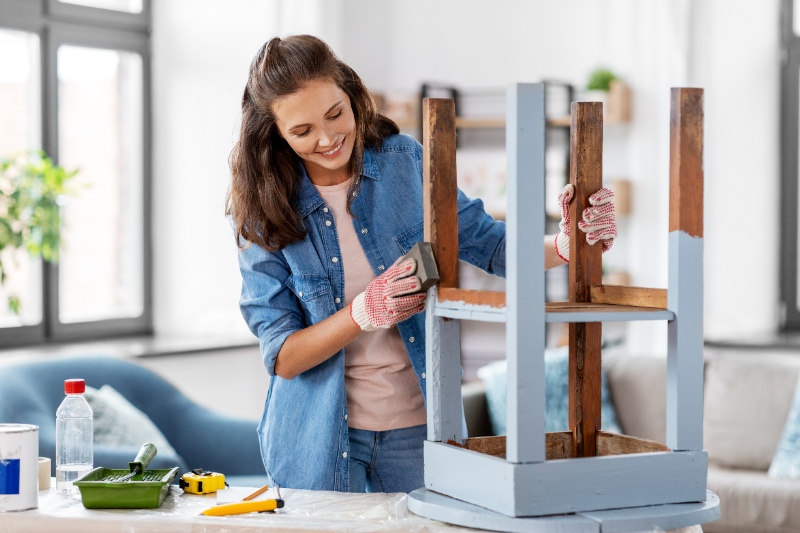
Upcycling means transforming unwanted items into something with greater value or purpose. Unlike recycling, which breaks down materials, upcycling preserves the original item while enhancing it.
When it comes to furniture, upcycling might involve:
- Repainting an old dresser
- Reupholstering a worn-out chair
- Repurposing a bookshelf into a kitchen island
- Adding new hardware to dated cabinets
Many upcycling projects require basic tools and materials, such as sandpaper, paint, and brushes. The key is seeing potential in discarded pieces.
Start with simple projects before tackling complicated transformations. Thrift stores, yard sales, and online marketplaces are perfect hunting grounds for furniture with good bones but a dated appearance.
Benefits of Upcycling Furniture

Upcycling furniture offers impressive advantages for your wallet and the planet. First, it’s incredibly budget-friendly. A $20 secondhand table can become a $200-looking centerpiece with just $30 in supplies.
You’ll create unique pieces that reflect your style. No more cookie-cutter furniture from big box stores! Your upcycled dresser or bookshelf won’t be found in anyone else’s home.
The environmental benefits are substantial, too. Each year, Americans throw away about 12 million tons of furniture. By upcycling, you:
- Reduce landfill waste
- Save resources needed for new manufacturing
- Lower your carbon footprint
Upcycling also provides creative satisfaction. There’s something deeply rewarding about transforming something old and unwanted into a beautiful, functional piece you’re proud to display in your home.
Planning Your Furniture Upcycle

Before diving into your furniture transformation project, you need a solid plan. Good planning helps you save money, avoid mistakes, and create pieces you love.
Setting a Budget

Start by deciding how much you can realistically spend on your upcycling project. I’ve found that most small furniture pieces can be beautifully transformed for under $50. Make a list of everything you’ll need:
- Base furniture piece
- Paint and primers
- Sandpaper and sanding blocks
- Brushes and rollers
- Hardware (knobs, handles, etc.)
- Decorative elements
- Protective finishes
Don’t forget to budget for tools you might need to buy or rent. Check your local hardware stores for sales on painting supplies – I once found high-quality brushes at 40% off!
You can save money by using what you already have at home. Look through your garage or storage areas for leftover paint or supplies from previous projects.
Selecting Furniture to Upcycle

The best places to find budget-friendly furniture are thrift stores, yard sales, Facebook Marketplace, and Craigslist. I recently found a solid wood dresser at a thrift store for just $25!
Look for these qualities when selecting a piece:
- Good bones – solid construction with minimal structural damage
- Quality materials – real wood is easier to work with than particleboard
- Simple fixes needed – cosmetic issues are easier than structural problems
Don’t fear ugly finishes, outdated colors, or minor scratches—they’re easy to fix! When browsing yard sales, go early for the best selection and late for the best deals.
Design and Inspiration
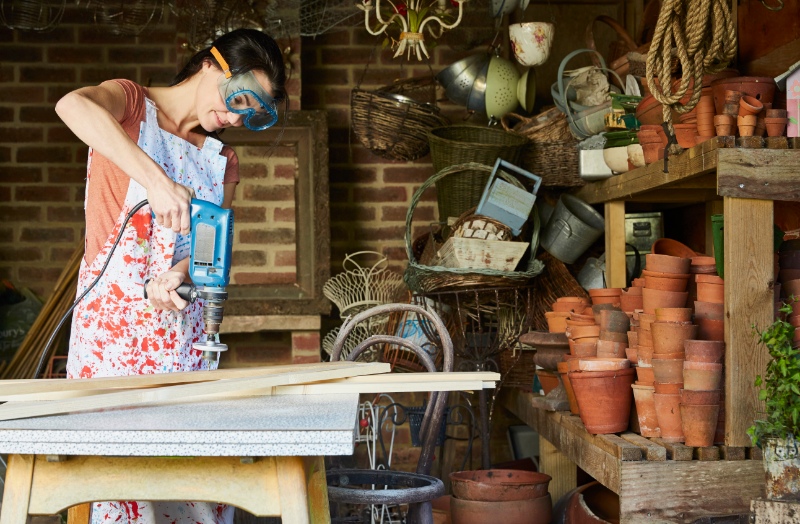
Before you start working, gather inspiration for your project. Create a Pinterest board or save images of styles you love. Think about:
- What colors would work in your space?
- What finish do you want? (distressed, modern, rustic)
- Will you keep the original hardware or replace it?
Try sketching your ideas or creating a simple mood board. This helps you visualize the finished piece and decide on colors and styles.
Match your upcycled piece to your home’s existing style. A coastal blue dresser might look out of place in a minimalist modern apartment.
Look at the search results for specific techniques – chalk paint creates a lovely rustic look perfect for beginners!
See Related: Frugal Meaning: Life-Changing Habits That Saved Our Family $15,000
Finding Budget-Friendly Furniture

The foundation of any successful furniture upcycling project starts with finding affordable pieces to transform. You don’t need to spend a lot to get quality items with great potential.
Thrift Stores and Flea Markets

Thrift stores are treasure troves for budget-conscious furniture hunters. Places like Goodwill, Salvation Army, and local charity shops regularly receive furniture donations at deeply discounted prices. I’ve found solid wood dressers for under $30 that would cost hundreds new.
Visit these stores on weekdays when they’re less crowded. Many offer special discount days—some Goodwill locations offer 50% off certain colored tags each week.
Don’t judge a piece by its current appearance! Look for good bones and solid construction rather than a perfect finish. Check for sturdy joints, real wood (vs. particleboard), and complete structural integrity.
Flea markets offer similar bargains but with more variety. Arrive early for the best selection, and don’t hesitate to negotiate. Bringing cash and a tape measure will make your shopping experience smoother.
Yard Sales and Curbside Finds

Yard sales can be goldmines for furniture bargains. Check local listings, Facebook community groups, and neighborhood signs to plan your route. Shop early for the best selection or late for deeper discounts when sellers are eager to clear everything out.
Many neighborhoods have “bulk pickup” days when residents place unwanted furniture on the curb. This is entirely free furniture; we await your creative touch! Drive around affluent areas the night before trash collection for surprisingly good finds.
Always inspect curbside items thoroughly before taking them home:
- Look for water damage or mold
- Check for pest infestations
- Test structural stability
- Smell for strong odors
I once rescued a beautiful oak table someone had left on the curb simply because one leg was wobbly. A quick fix with wood glue created a piece I still use today!
Online Marketplaces

Facebook Marketplace, Craigslist, and NextDoor have revolutionized second-hand furniture shopping. You can search for specific items, filter by price range, and see photos before visiting to view items.
Set up alerts for specific keywords like “dresser,” “bookcase,” or “free furniture” to get notifications when new listings match your criteria. The best deals disappear quickly!
When messaging sellers:
- Be polite and specific
- Ask about any damage not shown in photos
- Confirm dimensions
- Inquire about the item’s history
Don’t be afraid to negotiate, but do so respectfully. Many sellers price items, expecting some haggling. Having your transportation ready makes you a more appealing buyer for larger pieces that sellers don’t want to deliver.
Preparation and Repairs

Proper preparation is essential before transforming your furniture. Taking time to clean, sand, and repair your piece will ensure your upcycling project looks professional and lasts for years.
Cleaning and Sanding

Start by thoroughly cleaning your furniture piece. Remove all hardware, such as handles and knobs, and set them aside in a small container so they don’t get lost. Use a mild soap and water solution to wipe down wood furniture, removing years of dirt and grime.
Let the piece dry completely before moving on to sanding. Sanding is crucial – it helps paint or stain adhere better to the surface. For most projects, you’ll need:
- Medium-grit sandpaper (120-150) for initial sanding
- Fine-grit sandpaper (180-220) for finishing
- A sanding block or an electric sander for larger surfaces
You don’t always need to sand down to bare wood. Often, just roughing up the existing finish is enough. Work toward the wood grain and wipe away dust with a tack cloth between sandings.
For pieces with intricate details, use a small brush to clean dust from crevices. Good ventilation is important during sanding—I always work outside or near an open window.
Making Minor Repairs

Before painting or refinishing, address any damage to your furniture. Minor fixes now will prevent bigger problems later. Common repairs include:
Filling holes and cracks: Wood filler works wonderfully for small gaps and holes. Choose a stainable version if you plan to stain rather than paint.
Fixing wobbly legs: Tighten any loose screws. Add wood glue to loose joints and clamp until dry for wooden joinery.
Replacing broken parts: Sometimes you can find replacement parts at hardware stores or online. For budget options, check if parts from other furniture could work.
Don’t stress perfection—many minor imperfections add character to upcycled pieces. Decide if the repair cost makes sense for your project budget for serious structural issues. Allow all repairs to dry completely before proceeding with your makeover.
Creative Upcycling Techniques

Transform old furniture into stunning new pieces using these budget-friendly methods. These techniques can help you breathe new life into worn-out items without spending a fortune on new furniture.
Painting and Staining

Painting can transform furniture on a tight budget. You don’t need expensive supplies – just sandpaper, primer, and paint. Chalk paint is perfect for beginners since it requires minimal prep work and creates a beautiful matte finish.
Consider staining instead of painting wooden pieces. A new stain can highlight natural grain patterns while updating the color. First, sand the piece, then apply the stain with a cloth or brush.
Try color blocking for a modern look. Paint drawers different colors or create geometric patterns using painter’s tape. This technique costs practically nothing but looks high-end and custom.
Remember about hardware! For just a few dollars, swapping out old knobs and handles for new ones can completely change a piece’s look.
Adding Stencils and Patterns

Stencils offer an easy way to add professional-looking designs to plain furniture. You can purchase ready-made stencils or make your own from cardboard or plastic sheets. The possibilities are endless!
Try these stencil ideas:
- Geometric patterns on drawer fronts
- Floral designs on tabletops
- Words or quotes on chair backs
- Repeating patterns on cabinet doors
Decoupage is another budget-friendly technique that uses paper and glue to add patterns. Napkins, wrapping paper, old maps, or book pages work perfectly. Simply cut your paper to size, apply glue, and seal with a clear topcoat.
For a subtle look, try dry brushing – dip your brush in paint, wipe most of it off, then lightly brush over the surface. This creates depth and texture without overwhelming the piece.
Repurposing and Reimagining Pieces

Repurposing means giving furniture a completely new function. For example, an old dresser can become a kitchen island, TV stand, or bathroom vanity. This approach is both eco-friendly and budget-conscious.
Try these transformations:
- Turn a desk into a kitchen prep station
- Convert a bookshelf into a bar cart
- Use an old door as a headboard
- Transform a dresser into a changing table
Combining pieces creates unique furniture. For example, you could attach an old window frame to a coffee table to create a display case, or use crates as building blocks for custom shelving systems.
Don’t be afraid to mix and match. Pair dresser drawers with different legs to create side tables. Or attach drawer pulls to a board for a unique coat rack or jewelry organizer.
See Related: Proven Ways to Live a Simple and Frugal Life That Will Transform Your Finances and Happiness
Finishing Touches

The final details can transform your upcycled furniture from looking homemade to professionally crafted. These small but significant elements help protect your hard work and add personality to your piece.
Sealing and Protecting Your Work

Always seal your newly upcycled furniture to ensure longevity. Water-based polyurethane is budget-friendly at $10-15 per can and provides excellent protection for most projects. Apply 2-3 thin coats with a foam brush rather than one thick layer to prevent drips and bubbles.
Wax sealants offer a beautiful, soft finish for painted pieces. They’re slightly more expensive ($15-20), but a little goes a long way. Apply with a clean cloth using circular motions, then buff after it dries for a subtle sheen.
Don’t skip this step even when you’re on a tight budget! Unsealed furniture can chip, scratch, or stain within weeks, wasting all your hard work and materials.
Decorative Hardware and Accents

Swapping out hardware is one of the most affordable ways to elevate upcycled furniture. Check thrift stores, flea markets, or clearance bins for unique knobs and pulls ($1-5 each). Spray painting existing hardware is even cheaper – one $4 can covers numerous pieces!
Consider these budget-friendly accent ideas:
- Fabric accents: Line drawers with pretty fabric scraps
- Decoupage: Apply decorative paper to flat surfaces using watered-down glue
- Trim details: Add wooden appliqués ($2-5 each) to plain furniture fronts
- Stencils: Create custom patterns without artistic skill
Look for small sample sizes of accent materials. Home improvement stores often sell “oops” paint for $1-5, which is perfect for small furniture projects.
Upcycling Success Stories

Transforming old furniture into beautiful new pieces saves money and creates unique items with personal stories. Let’s look at some inspiring transformations and their actual costs to show what’s possible with creativity and a small budget.
Before and After Transformations

A worn-out oak dresser found at a yard sale for $25 became a stunning kitchen island with just paint, new hardware, and a butcher block top. The total project cost was under $100 but resulted in a piece worth $400-500 new.
Another impressive transformation came from Michelle, who found a dated coffee table for $15. She sanded it down, applied a white chalk paint finish, and added new legs purchased online for $30. The modern piece now looks like something from a high-end store.
An old bookshelf headed for the landfill got new life with teal paint and wallpaper backing. The owner spent just $22 on supplies and created a statement piece that receives compliments from every visitor.
Old wooden chairs are perfect upcycling candidates. One crafty DIYer collected mismatched dining chairs for $5-10 each, painted them in coordinating colors, and reupholstered the seats with fabric remnants.
Budget Breakdowns

Most successful furniture upcyclers report spending between $20 and $ 75 on materials per project. Here’s a typical budget breakdown:
- Base furniture piece: $0-30 (thrift stores, yard sales, free listings)
- Paint: $15-25 (one quart usually covers a medium piece)
- New hardware: $10-20 (knobs, handles, hinges)
- Finishing supplies: $5-15 (sandpaper, wax, sealants)
- Optional extras: $10-30 (fabric, decorative elements)
Smart upcyclers save by buying paint during sales or using sample pots for small projects. Many reuse materials from other projects or swap supplies with friends.
The most budget-friendly transformations often use what you already have at home. One creative person turned a plain side table into a lovely piece using leftover wall paint and drawer pulls from another furniture update, spending $0 on the refresh.
See Related: Is It Smart to Be Frugal? Money-Saving Habits That Transformed My Finances
Frequently Asked Questions

Upcycling furniture can initially feel overwhelming, but many common questions have simple answers. Let’s address the most frequent concerns about breathing new life into old pieces without spending a fortune.
What are some affordable ways to revitalize worn furniture?
The cheapest way to transform furniture is with paint you already own or can get inexpensively. Check your local hardware store’s “oops” section for discounted paint that someone returned.
Thrift stores often sell partial cans of paint for just a few dollars. You might find enough to cover a small piece like a side table or chair.
Hardware updates make a huge difference, too. Replacing old knobs and handles can completely change a dresser’s look for under $20. I’ve found great deals on cabinet hardware at flea markets and yard sales for less than $1 per piece.
Can you give me tips for beginner-friendly furniture upcycling projects?
Start with a small piece like a wooden stool or side table. These projects are manageable and won’t overwhelm you if you make mistakes.
Sand lightly, clean thoroughly, and apply primer before painting. These basic steps will help ensure your finish lasts longer.
Try using chalk paint for your first project. It requires minimal prep work and creates a beautiful, forgiving finish. You can even make your DIY version with regular latex paint and plaster of Paris to save money.
What paint should I use to refresh my old furniture without breaking the bank?
Latex paint offers great value and durability. Look for sales at hardware stores or buy sample pots, which are perfect for small pieces and cost around $3-5 each.
Chalk paint is excellent for beginners, but can be pricey. Make your own by mixing two tablespoons of plaster of Paris with one tablespoon of water, then adding 1 cup of latex paint.
Milk paint comes in powder form, and you mix only what you need. This prevents waste and saves money in the long run. A small bag costs about $12-20 but goes surprisingly far.
How can I give my bedroom furniture a new lease of life with upcycling?
Change the look of a bed frame with fabric. Upholstering a headboard with padding and fabric can cost under $30 and completely transform your bedroom’s focal point.
Update nightstands with fresh paint and new hardware. Try coordinating colors that complement your bedding for a cohesive look.
For dressers, try the ombré technique where drawers gradually shift from dark to light shades. This creates a designer look using just one can of paint and some white paint to create the different tints.
Do you have any creative ideas for repurposing old wood furniture?
Transform an old door into a headboard or dining table by adding legs. Doors can often be found free on marketplace sites or in construction dumpsters (with permission).
Convert a dresser missing drawers into a bench by removing the middle drawers and adding a cushioned seat. Keep the top drawers functional for storage.
When mounted horizontally on a wall, old wooden ladders make excellent blanket racks or bookshelves. I found an old ladder in my grandfather’s shed that now displays my favorite throws in my living room.
What are some budget-friendly techniques for upcycling dark wood furniture?
Whitewashing creates a lovely, aged look that lets the wood grain show through. You can mix one part white paint with two parts water and apply it with a cloth, wiping away the excess.
Try color blocking by painting only portions of the piece, exposing some of the original wood. This creates a modern look without covering the entire surface.
Wood stain can update dark furniture without hiding the grain. Lighter stains like golden oak can brighten dark pieces for about $10 per can, covering several pieces of furniture.
Leave a Reply